FileMaker™ Pro – From the Beginning
As I sat down to write this, I remembered what it was like to learn about databases in general. In those days, I was learning to script in Hypercard and the concepts, while similar, were less like what we think of as a database and more based on the metaphor of Stacks of index cards. Maybe learning that way helped, but when I was faced with learning Panorama and FileMaker™. The year was 1988 and I had just decided that spreadsheets and word processors weren’t going to be able to do what I wanted to do in terms of organizing information. Hypercard was pretty cool and had introduced me to scripting and managing data, but it was a bit unreliable and slow. I just remember trying to wrap my head around ‘data’… and I still try to remember what that was like as I teach others. I tell you all this not because you need to know my story, but because I want you to know that I’m sensitive to yours. If you’re still trying to wrap your head around all this, I’ll be here to help you to ‘get it’.
Here’s an interesting way to relate the 3 basic uses of the computer.
- Word and text processors allow for the most freedom in arranging text. You can put whatever you want in any order with very little in the way of rules.
- Spreadsheets add more order by allowing for putting text in columns and rows creating a grid of text.
- Databases allow for more organization, and function. In fact, every program or app you use is a database if you look under the hood.
For our first lesson, we’ll do a bit of ‘solution design’ based on something we can all understand, Business Cards. We’ll design a system we use to dump our business card collection into. From there we can decide what to do with them… we can schedule calls for these people we’ve just met, or maybe you’re cleaning out a drawer where you’ve been stashing them and you want to ‘tag’ them to put them in categories. We’ll get to that later, but to start off we just need a place to begin. Let’s start with this card… it’s mine. Feel free to use it or grab another you might have handy.

The first thing we would do is determine what information we want to capture. Let’s list the different parts.
- Name
- email address
- phone number
obviously this guy is from the ‘less-is-more’ school of design. If we grab another one, we’ll also see:
- Company
- address
- title.
Let’s start there and make a list of the bits of information we want to put in our system.
- Company Name
- Company Address
- Phone number
- Email Address
- Title
- Person Name
These aren’t in any particular order and it won’t matter for a while. We’ll only care about that once we start thinking about the order we want to do the data entry in. (order in which we want to do data entry? yeah… better)
The next thing we’ll want to do is decide if we want to break these up a bit… Person Name can be thought of as First Name and Last Name. And of course if you’ve spent any time with your Contacts or Address Book, you already know where this is going. We’ll break up the name that way and we’ll break up the Address into Street, City, State, Postal Code, and Country. Just for good measure, and to make sure we have room for whatever we find on a card, we’ll make a second line for the Street address where we can put things like ‘suite #’ or apartment #. It seems like there’s always a second line needed. So here’s the new list with all that in mind.
- Company
- First Name
- Last Name
- Street Address 1
- Street Address 2
- City
- State
- Postal Code
- Country
- Phone
- Title
Now that we’ve determined what information we want to snag from the cards, let’s back up a second and talk about databases and structure. The basic elements of a database are tables, fields, and records. In our example each business card is a record in a table. You can think of each record as a row in a spreadsheet. Each piece of information (e.g. first name, last name, etc) is stored in a field. A table is made up of fields where each field is designed to hold one kind of information. So we might make a new database file with one table called ‘cards’. Then we’d make 12 fields – one for each of the bits of information we’ve listed above. Once those fields are created, we would be able to get to work storing the information from our stack of business cards. Well… in theory anyway. In order to make the job of data entry easy and efficient, we’d have to make a layout and arrange our fields so that the fields are in a logical order, but let’s not get ahead of ourselves. Let’s open FileMaker™ Pro and get all this done up to here.
Side Note: Notice that I didn’t include Fax? Yes, you still see it on some cards but can we just let it go? The facsimile (fax) machine is absolutely the oldest and least relevant technology still in use. It was first used in 1843 as a way of moving pictures over a TELEGRAPH! It’s use has been largely abandoned for a variety of reasons in the last 10 years, including the transition of phone lines to digital technology that have made it hard on the old analog machine to get a signal through. But mostly because we have better options now – like sending the original document in an email instead of printing it, scanning it then taking a picture and sending it over a land line. Let’s just move on. Tell grandpa to get an email address! (sorry, not sorry)
Moving on. 😊
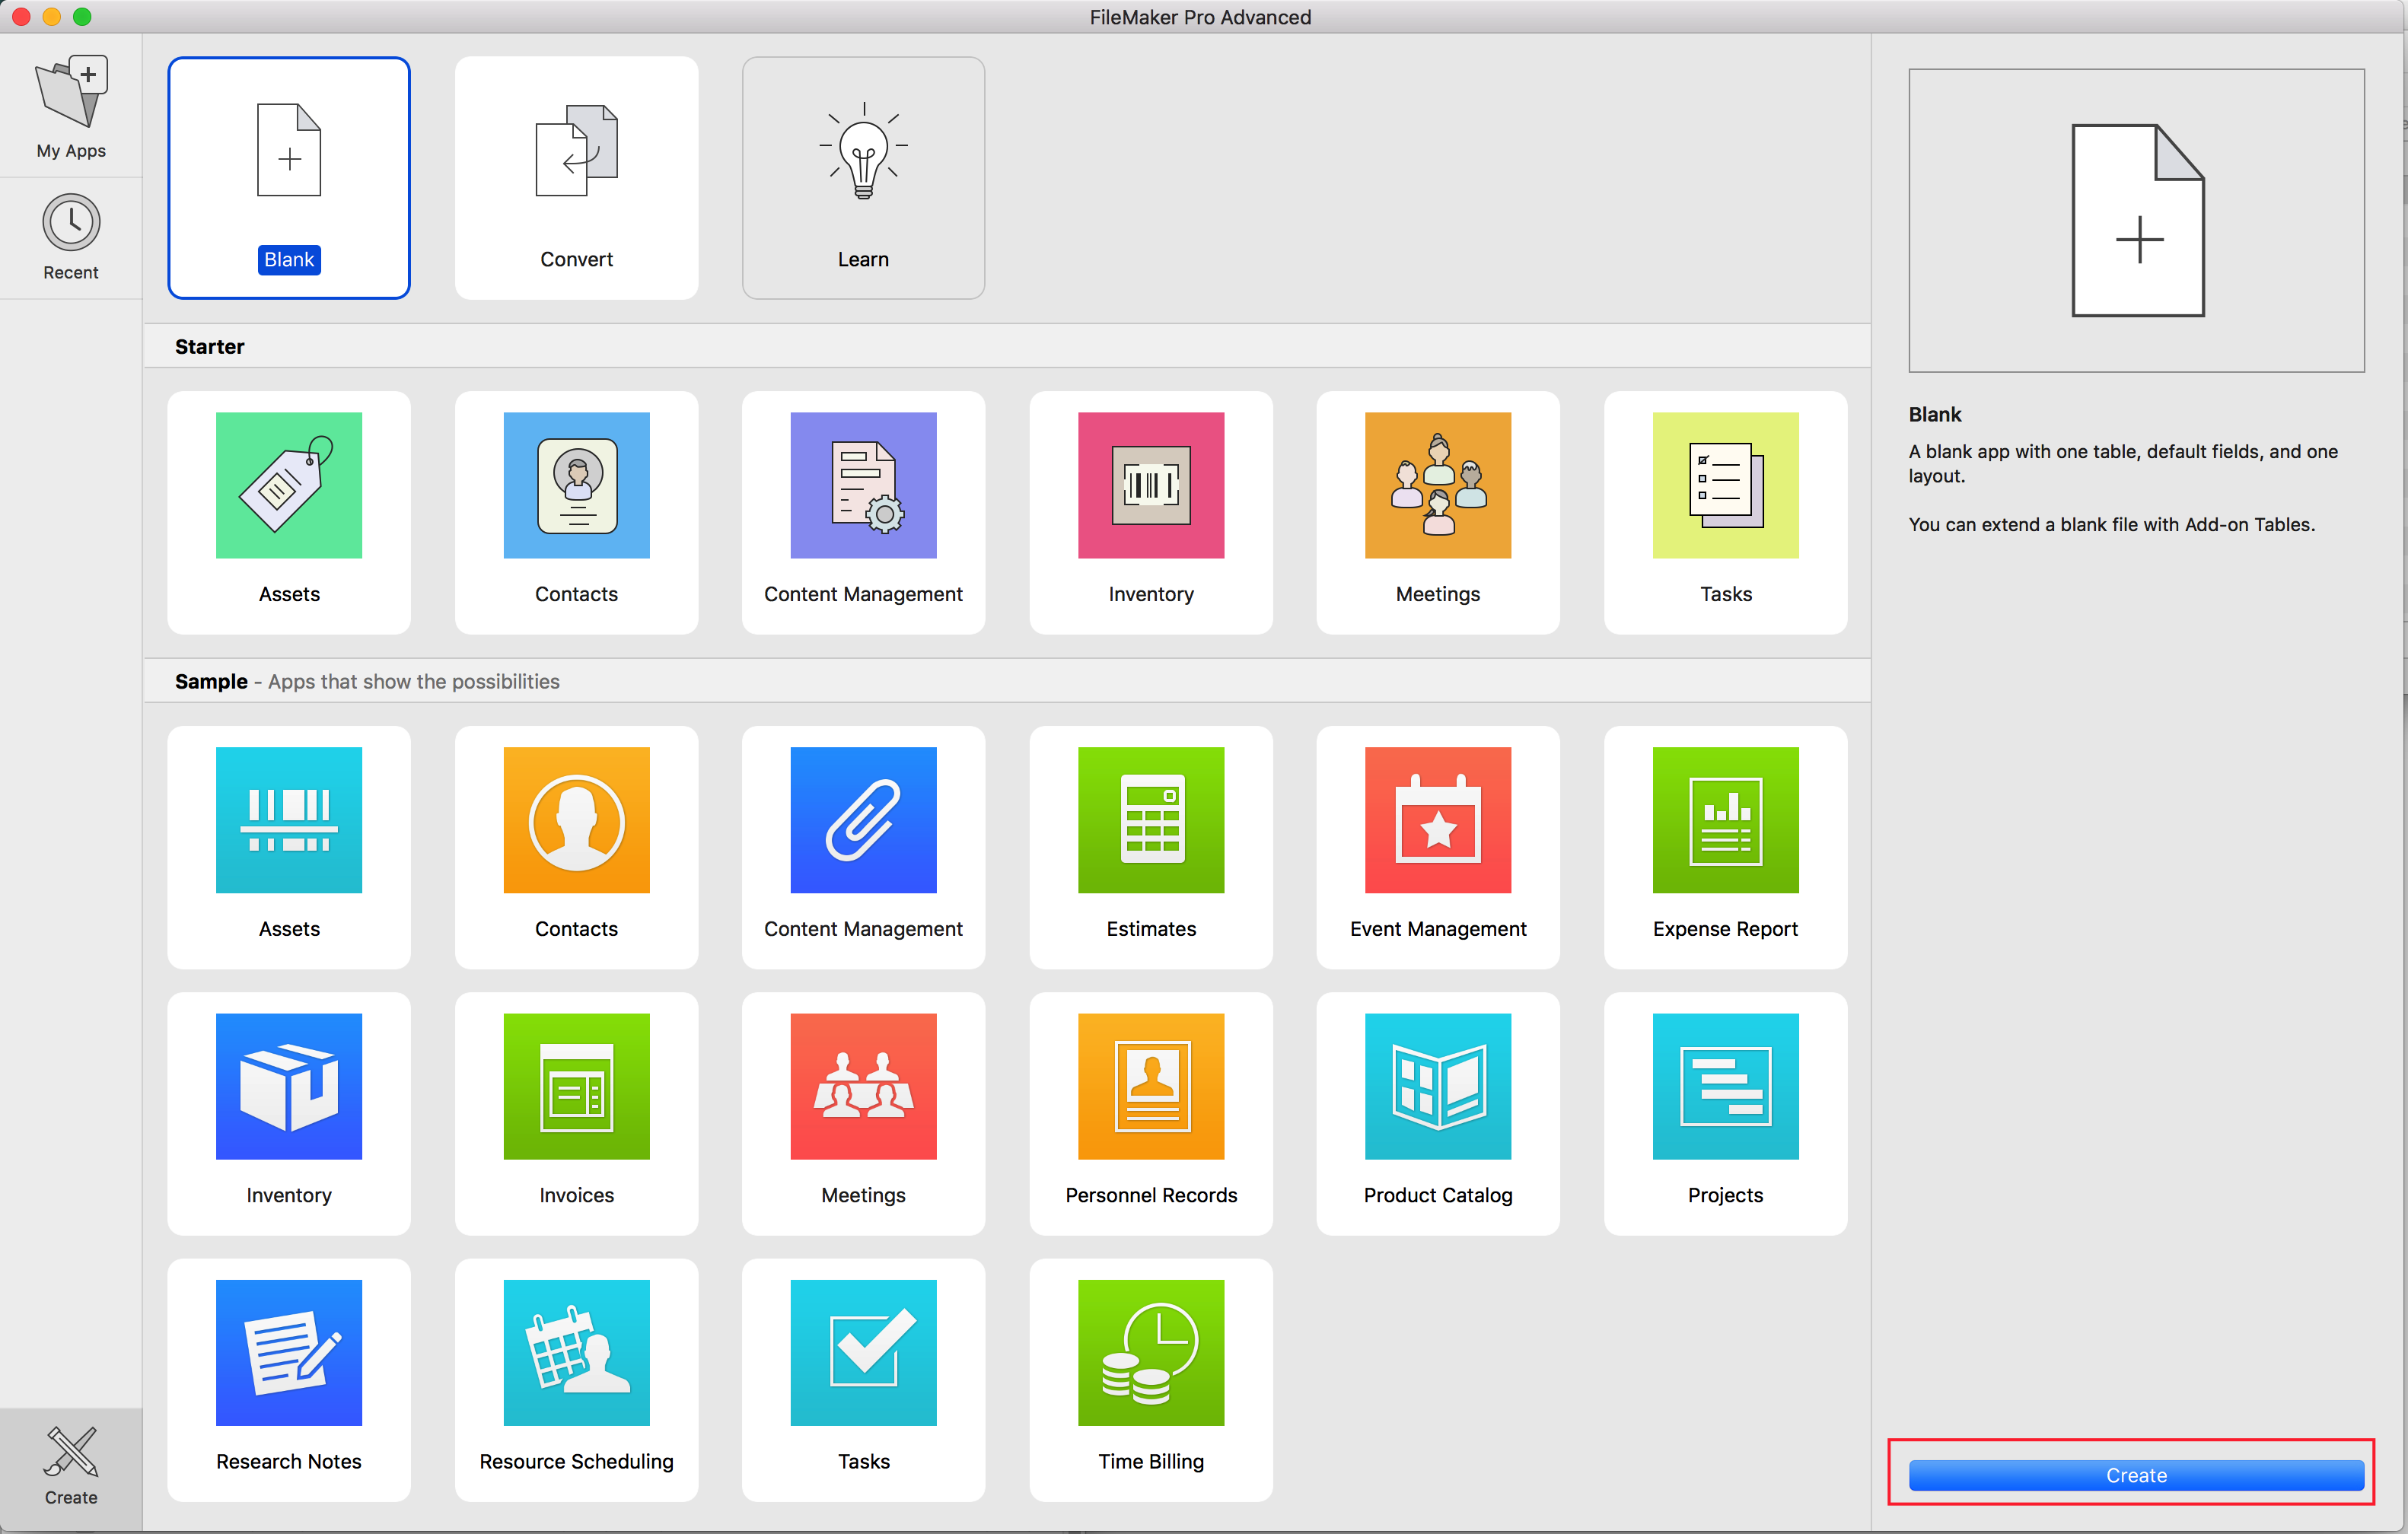
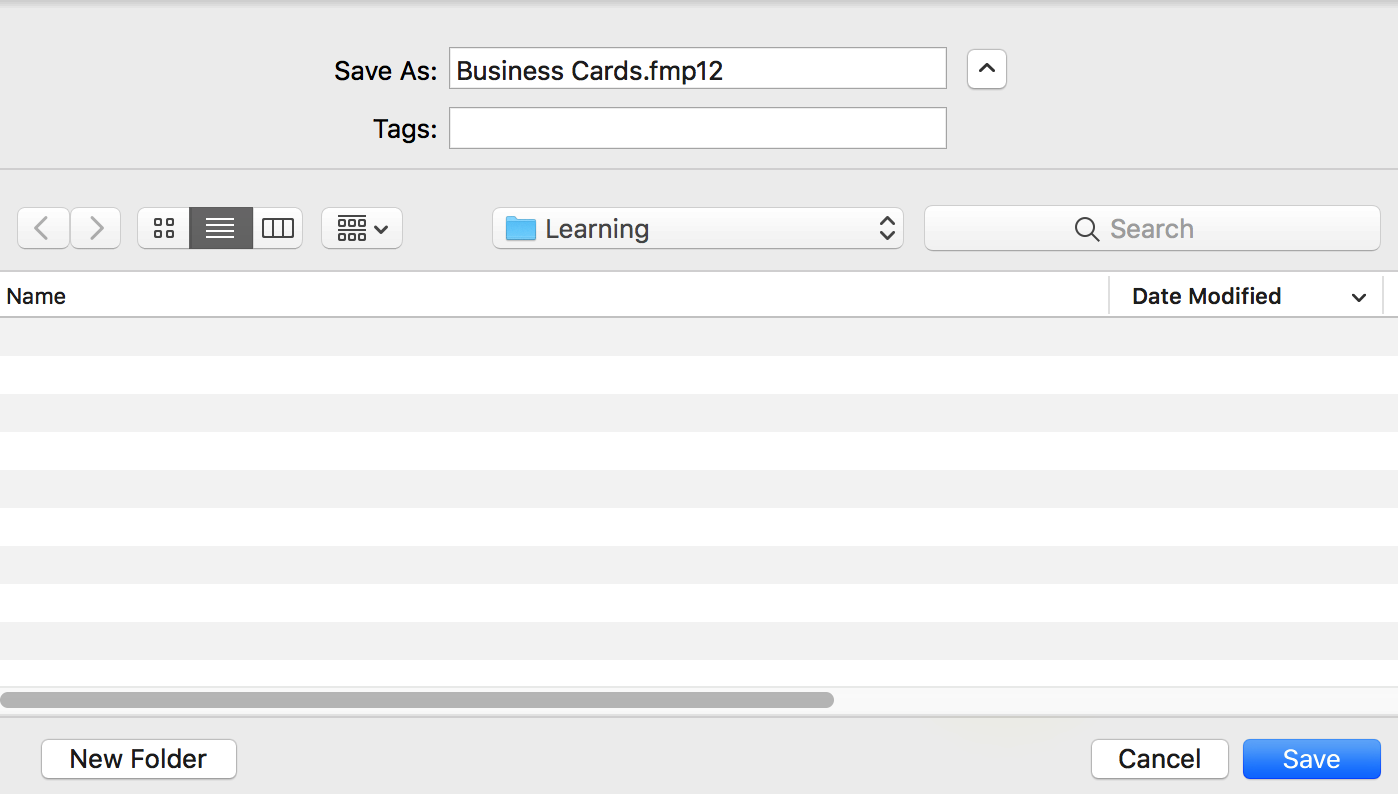
Once you have FileMaker™ Pro open, you’ll be presented with some version of this dialog. The trick at this point is to just make a new, blank database. We’re not going to use any templates at this point since we’re trying to learn the basics. Choose Blank and hit the ‘create’ button. You’ll give it a name and save it. It doesn’t really matter what you call it, but lets make things easy and call it Business Cards.fmp12.
What we’re looking for next is what FileMaker™ Pro calls the Define Database dialog.
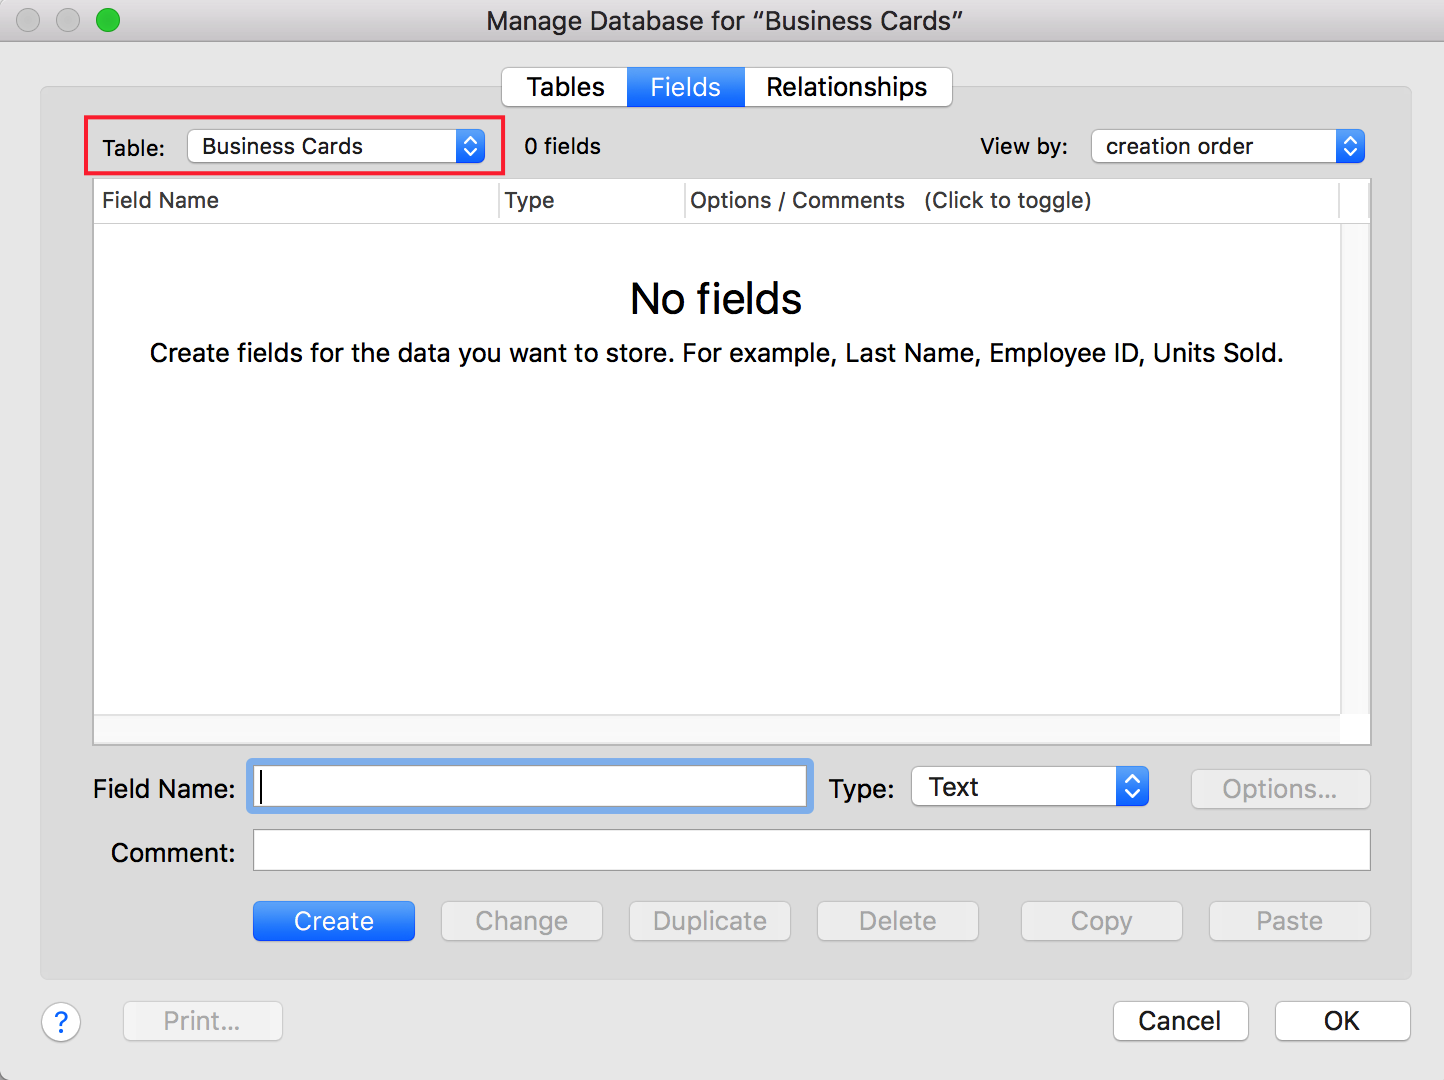
I’ve hilighted something interesting. In order to move things along, FileMaker™ Pro has named your first Table for you based on the name you gave your database. If you had called it Fred, this would say Fred. While that would be fine for a filename, it’s not very descriptive for a Table name. If you had done that, you’d probably want to rename the Table to Business Cards before moving on but that would just be another detour. 🙂
At this point, let’s start typing our first Field Name where it’s called for. We’ll start with Company and click Create.
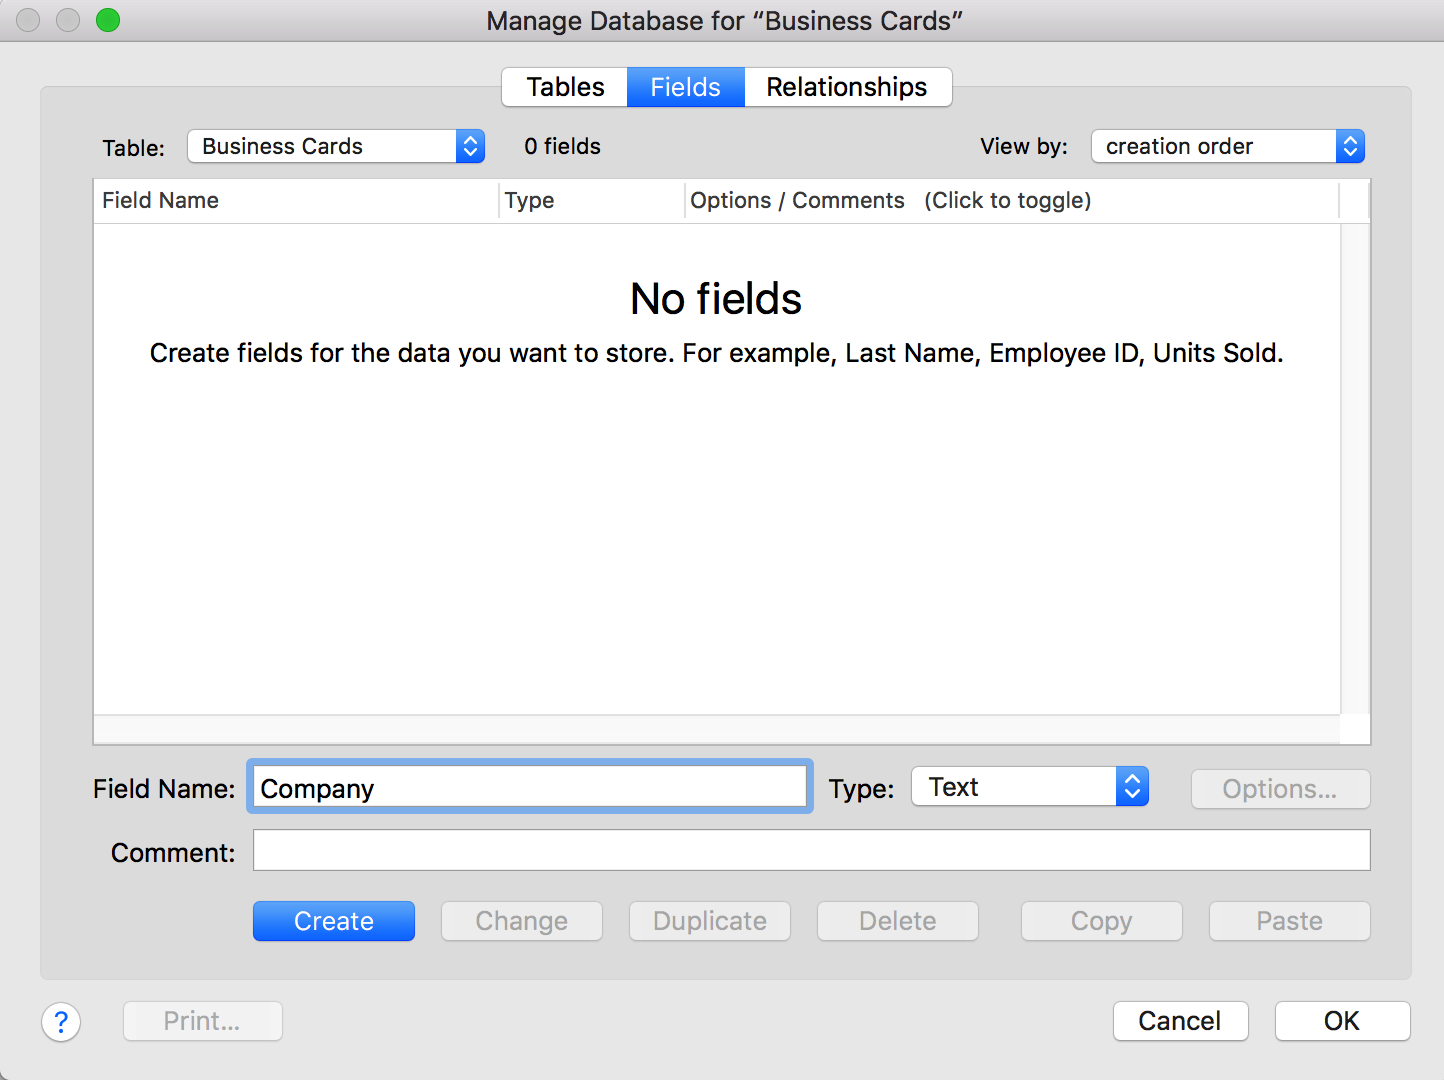
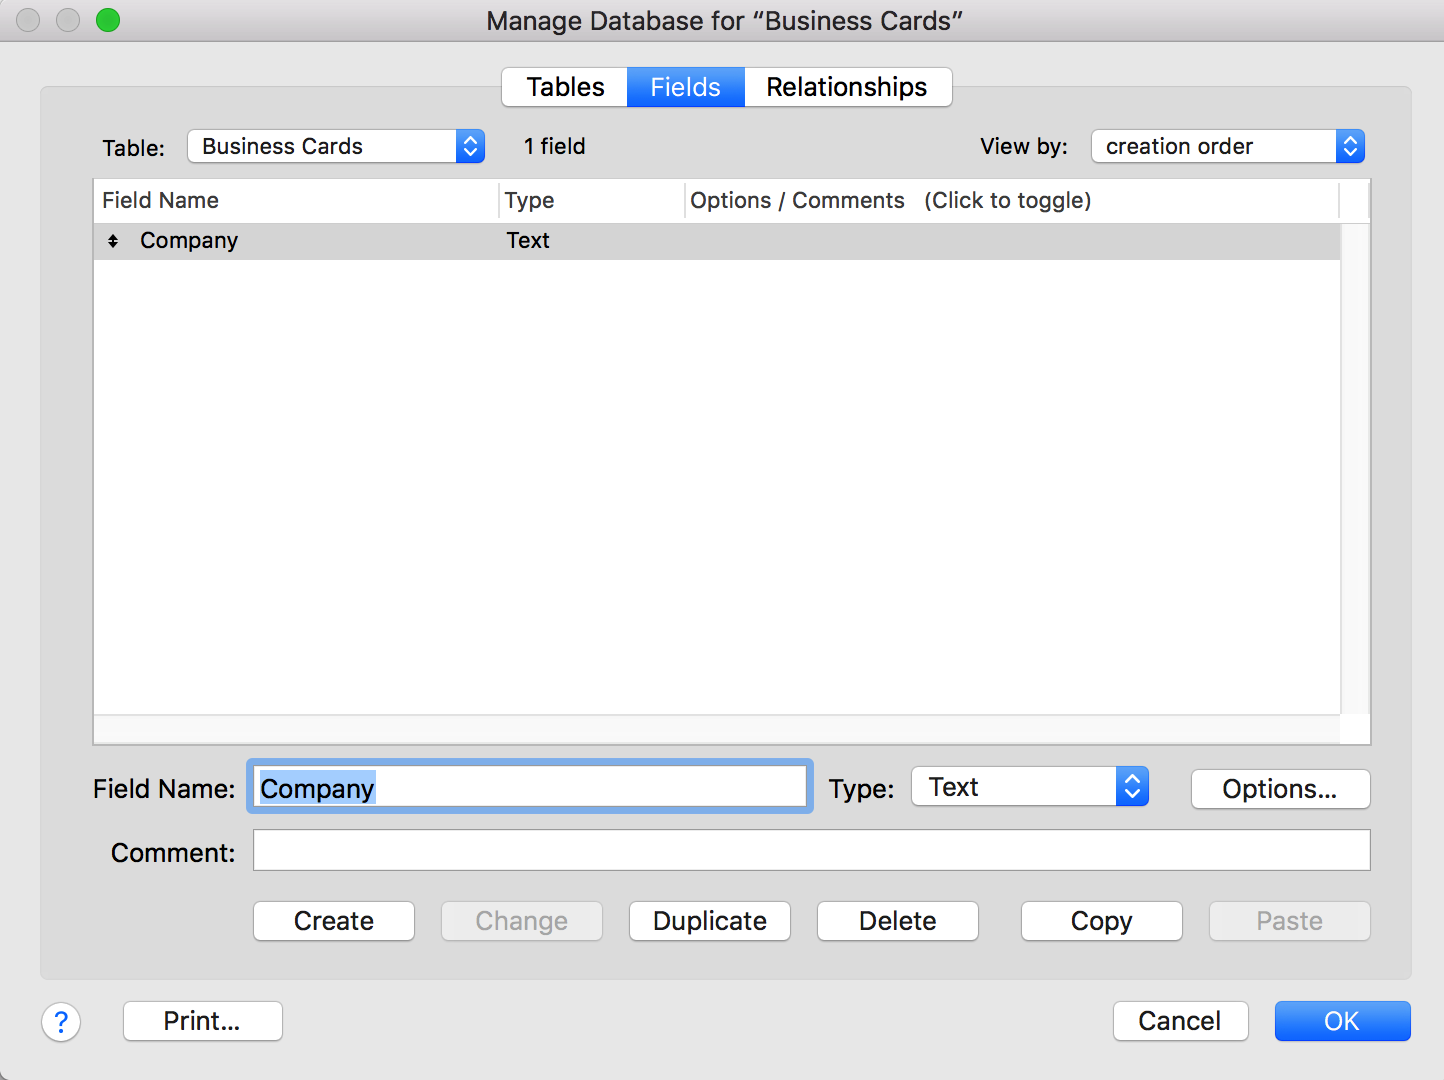
Notice what happened when you clicked Create? It added a field to the list and left it selected. This allows you to make some adjustments to the new field if you wanted… adding a comment to help you remember why you wanted this field or changing it’s type or assigning some options. We’ll get to each of these as we go. For now, keep adding the fields from the list and hit ‘create’ for each until you have them all created. When complete, you should have something that looks like this:
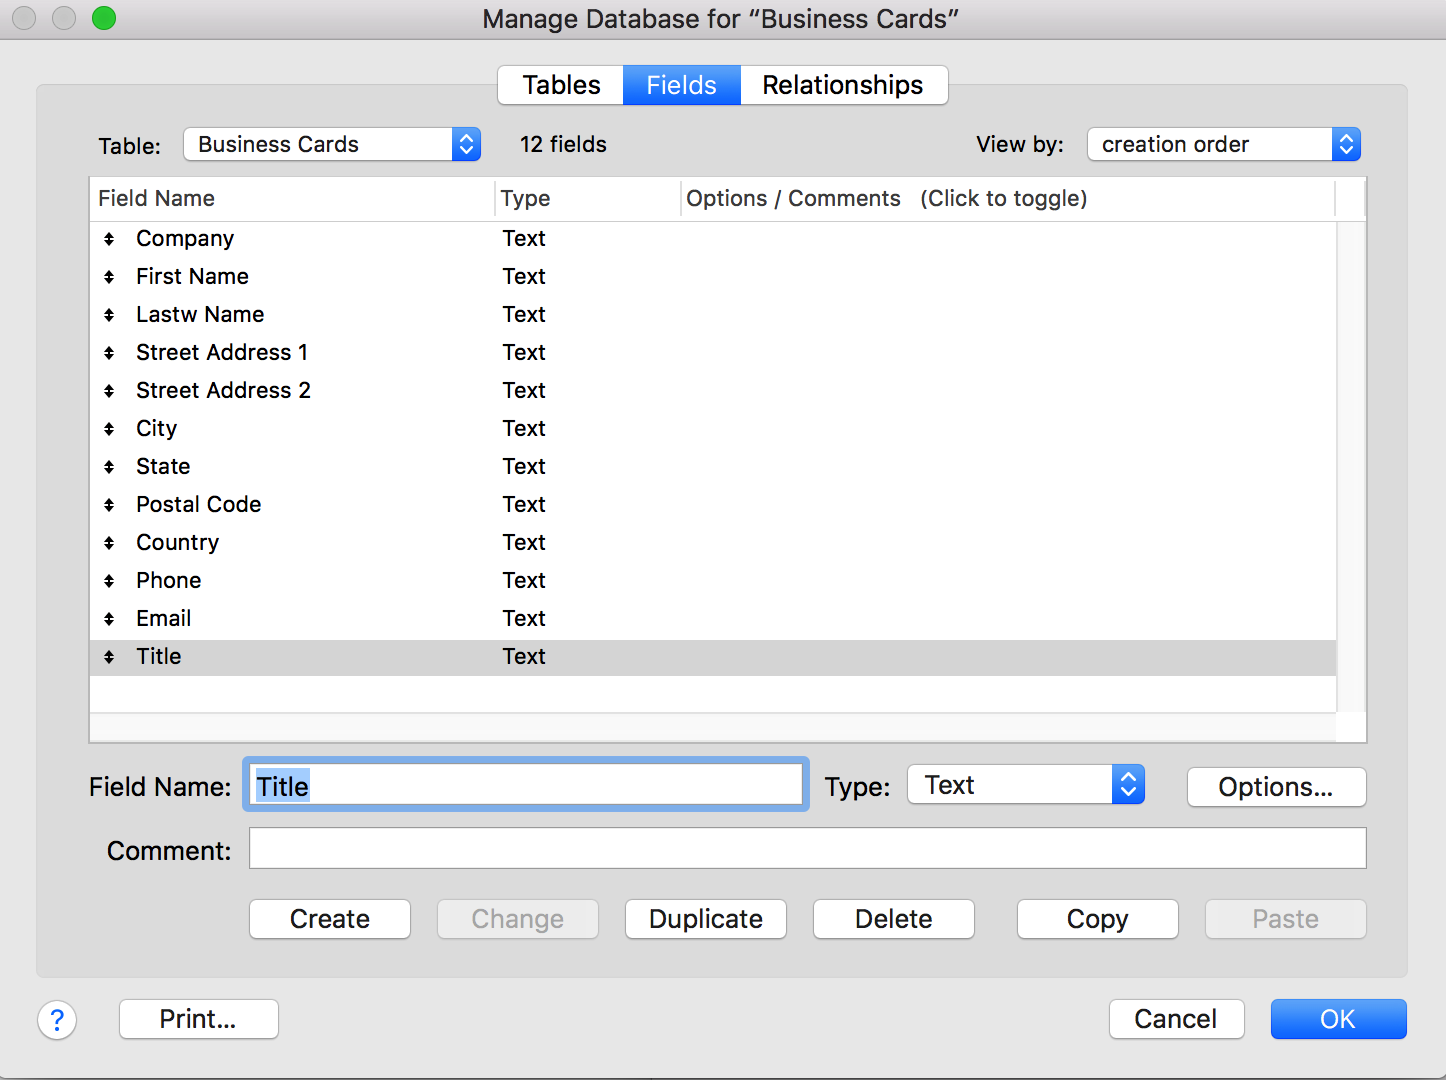
When yours looks like this, hit the ‘OK’ button to complete the adding of fields to your table.
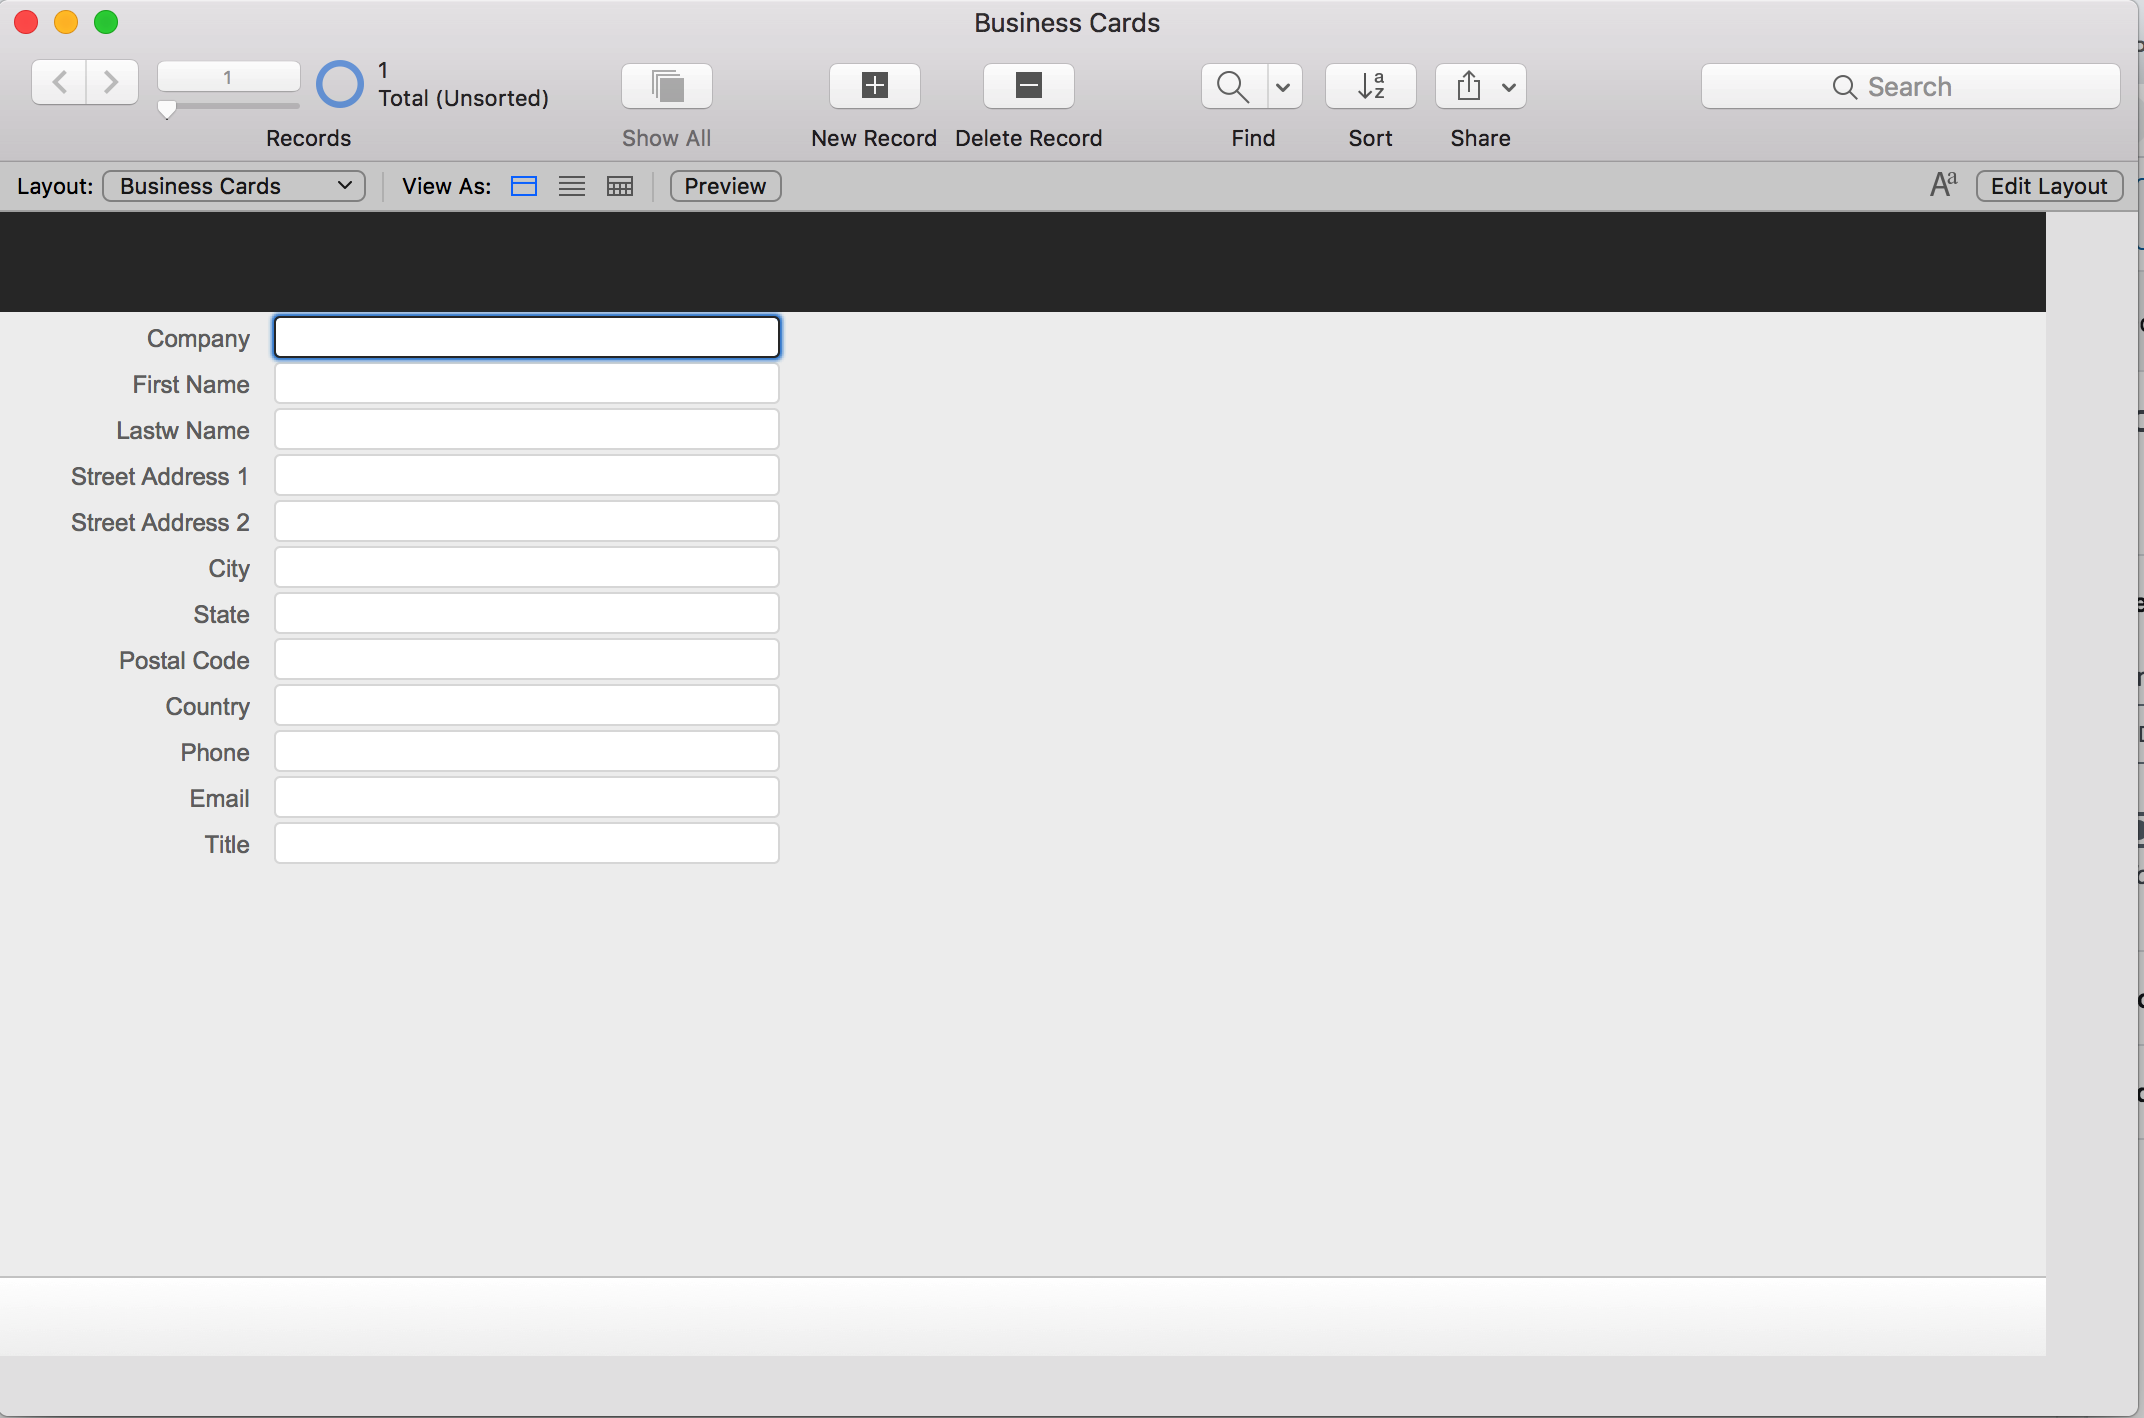
Well look at that! You have a screen with fields on it and you can start adding records and storing business cards! cool. Let’s looks around a bit and get familiar with the screen and your options. Then we’ll add a couple of cards so we have something to play with. By the way… the screens in FileMaker™ Pro are called Layouts. Later, we’ll look at how to add them and adjust the way they look to suit our needs. For now we’ll leave it looking just like this as learn to use the basic functions. Patience, grasshopper.

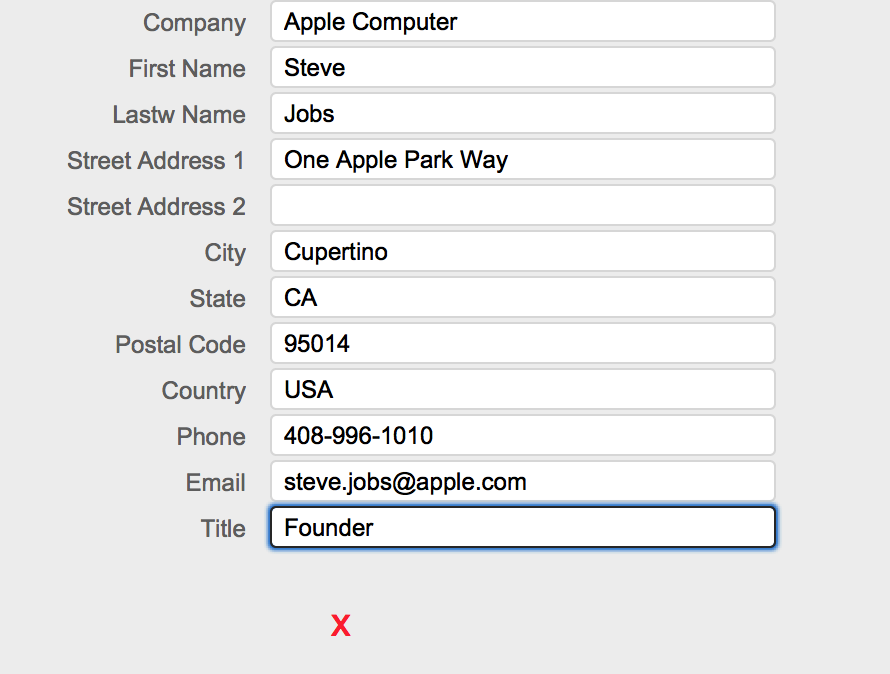
This is the Status Area or toolbar at the top of the window. These allow you to access some of the most often needed features like creating and deleting records and sorting. We’ll cover the rest as we need them. In the upper-left corner is a bit of navigation for the records themselves. You can see at this point that the system has started you off with 1 blank record. Let’s fill it in with the information from a card. You can use the one above or you can grab one from your own collection. To start, click into the first field (or hit the Tab key) and type the information for the Company name. When you’ve finished typing the name, click in the next field (or if there’s no Company information) and move on with entering the rest of the information. You can certainly keep clicking in the next field to advance after each field, but using the Tab key is much faster. You can also move backwards through the fields by adding the Shift key to the Tab. So… Tab moves to the next field and Shift-Tab moves to the previous field. Neat, huh? In this image, notice that the field you’ve selected has an outline around it. As you move from field to field, this will show you which field is currently ‘active’ or ‘selected’. Go ahead and type in the rest of the information for your card.
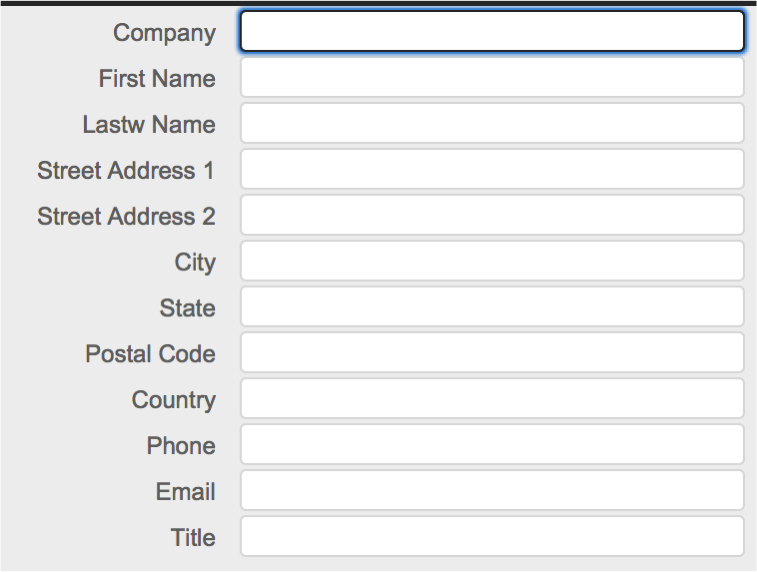
Once you’re done entering the information for your first card, you should have something like this. Notice that our last field is still hilighted and has that outline… this also tells us that the record is still ‘being edited’. In order to close the editing and ‘save’ the record, we very simply click anywhere outside of the fields. The ‘x’ in the image shows a place that qualifies. Click and notice the difference.
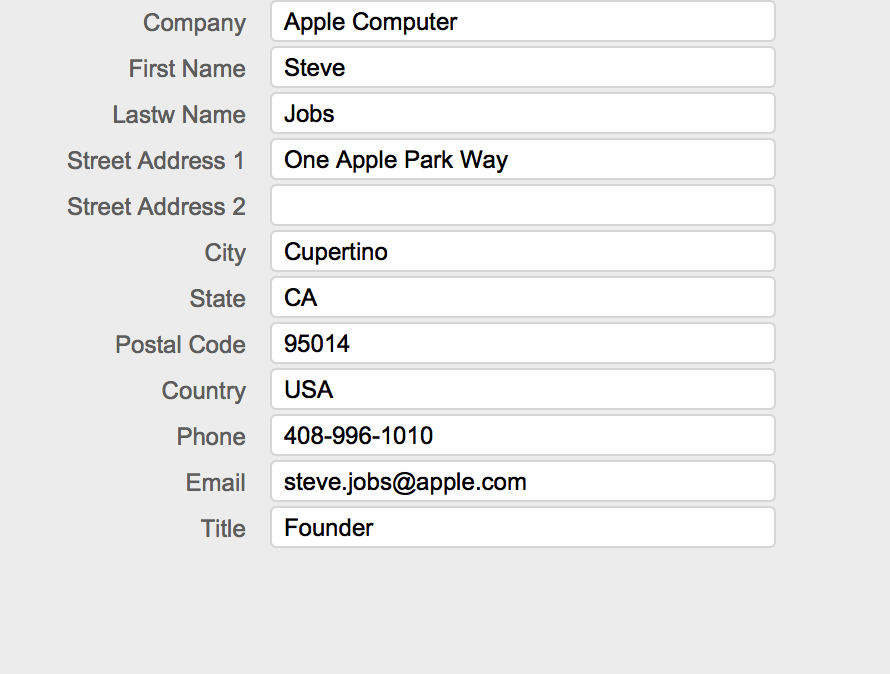
You can see the difference… this record is now saved and not being edited. In the language of databases it was also ‘locked’ while you were editing it. Not important right now, but I’ll keep adding these words to your vocabulary as we go. They’ll be important later. For now, pat yourself on the back – you’ve completed creating a database, adding a record and saving your work. Next task is to grab another card and make another record.

Click the button call ‘New Record’ (or use the keyboard shortcut… Command-N on the Mac or Ctrl-N on Windows) and you’ll have a new form for adding your next card. As soon as you’ve hit this button, you’ll also see a change in the Records area showing that you now have 2 records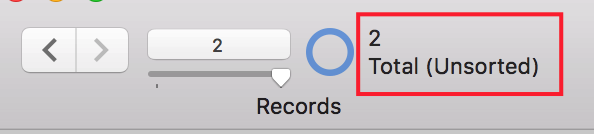 and the marker is showing that you’re looking at the 2nd one.
At this point, you should have a good handle on the definitions for
- Table
- Field
- Layout
- Record
- Status Area
Go ahead and enter more records from that collection of business cards you have. If you don’t have a stack of business cards, just start entering all the information you have about your business associates and your friends. If you don’t have friends or associates, it sounds like you’ve finally found your calling – you’re a developer and didn’t know it! 
Next we’ll learn about Sorting the records and we’ll get into editing and adjusting the Layout. If you have questions, hit me up in the comments.
Really good start to becoming familiar with structure and functions built into FMP.
Thanks for checking it out. Stay tuned for the next one on layouts. Hoping it helps you with how to make your data look good on iPhone and iPad screens.