Building the Hamburger menu in Filemaker
Let’s start with an introduction to the “hamburger menu”. Named for it’s similarity with a sideview of a hamburger sandwich, the menu is a small icon with three short stacked horizontal lines. You’ve seen them but you may not have known it even had a name. This menu is built using a button, a layout that shows when you touch the button and a script that drives everything. The layout that shows the menu can be built in several ways but we’ll use a button bar in this example just to throw in another Filemaker Pro technology for any of you not familiar with it.
The hamburger menu can be used for all kinds of things but usually you find it where space is limited and you have options to show the user that would take up too much space. In this example I’m using my daily journal and organizer database. I don’t know that anyone else has ever seen this file, but this is where I jot notes and keep track of when things happen so if I need to I can look back and have a record of what day I gave the dog her medicine or when I had that conversation with a client. (It’s super-handy to have). I also use this file as a place to experiment in Filemaker Pro and try new things or build the first version of a new tool. If you’re interested in a cleaned up version of this for yourself, let me know. I’ll see what I can do.
My use of the hamburger menu provides easy access to some of the solutions that I use often, including ready access to the Time Billing system, my CRM, and our records of client’s Filemaker Pro licensing. But that’s just the things I use most. I also put buttons on there to give me access to things I might forget about. 😁
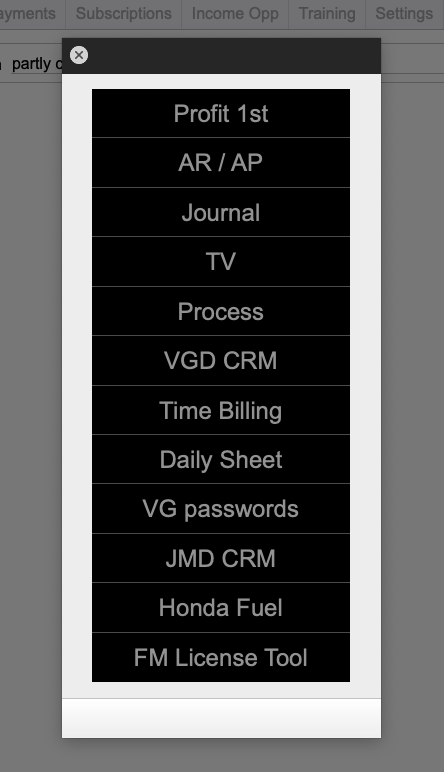
Here’s my menu as an example: You’ll see this is what Filemaker Pro calls a card window that is displayed in front of the existing window. There are other choices for displaying it, but this is the easiest.
If you read to the end, I’ll also show you a cool trick for opening a non-Filemaker Pro document in it’s own application. I use that to open a thing I print most days to put on my clipboard for physical notes. (AppleScript to the rescue)
The Button: Let’s get started on our own Hamburger menu by choosing layout mode on your solution and adding a button to the layout.

Choose the button tool and drag a rectangle on the layout. This produces the button and opens a dialog for defining it’s look and what it does when touched.

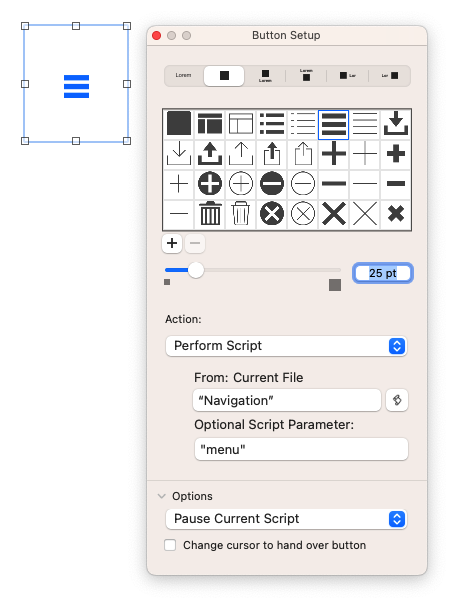
After a quick bit of editing of this dialog we get the following. Starting at the top we’ve chosen to show only the icon and then we choose what icon. The hamburger menu is on the top row of the standard choices and is 3rd from the right. I’ve made it just a little bigger than the default at 25 points. We’re going to point this button at a script and drive all of this lesson from this one script based on the Script Parameter. This button will do no more than show a menu. The buttons on the menu will use this same script and different parameters. (it’s all going to make sense soon)
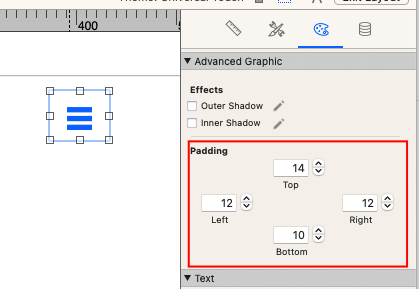
One of the details I’ll show you now about this button that can be maddening is that the icon and label (if you use it) are kept away from the edges of the button by a concept called padding. The image below shows the default settings for a newly created button and I’ve reduced the size of the button to show that padding around the icon. I can’t make it smaller without squishing the icon; but if we make those padding numbers zeros…
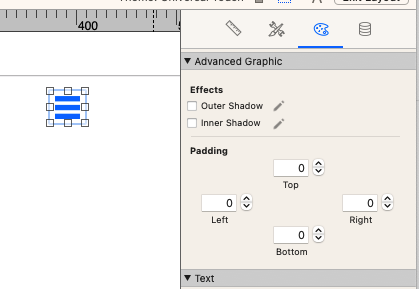
You can see that we can squeeze the button down to the edges of the icon. This may not be what you’re after but sometimes when you have a small space where you want this, you’ll need this trick.
Now that we have a button, let’s get started doing something with it.
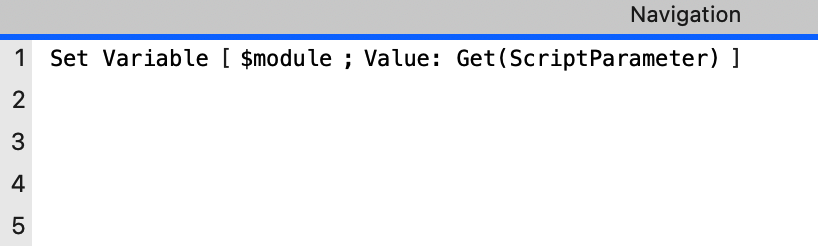
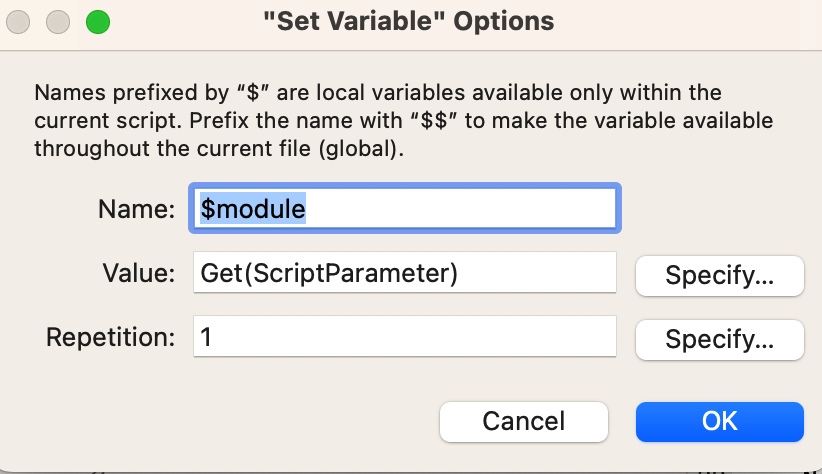
In order to point your button at a script, you’ll need to create it. Let’s start with a simple script that responds to the button we’ve just made. If you haven’t used script parameters before, this will be new and you’ll likely be surprised at how simple it really is. We specify the parameter that the button will send into the script so in the script we’ll need to allow for it. Let’s start by putting that parameter into a variable right at the top of the script. During the execution of the script, we’ll just look at that variable for it’s value. The end result looks like this, and if you’re not familiar with setting variables the 2nd image below shows how that dialog is filled in. We use a local variable because we don’t need that information beyond the execution of this script. Now we have a script with a variable carrying the parameter “menu” all the way thru the script. Next we’ll process that into a command.
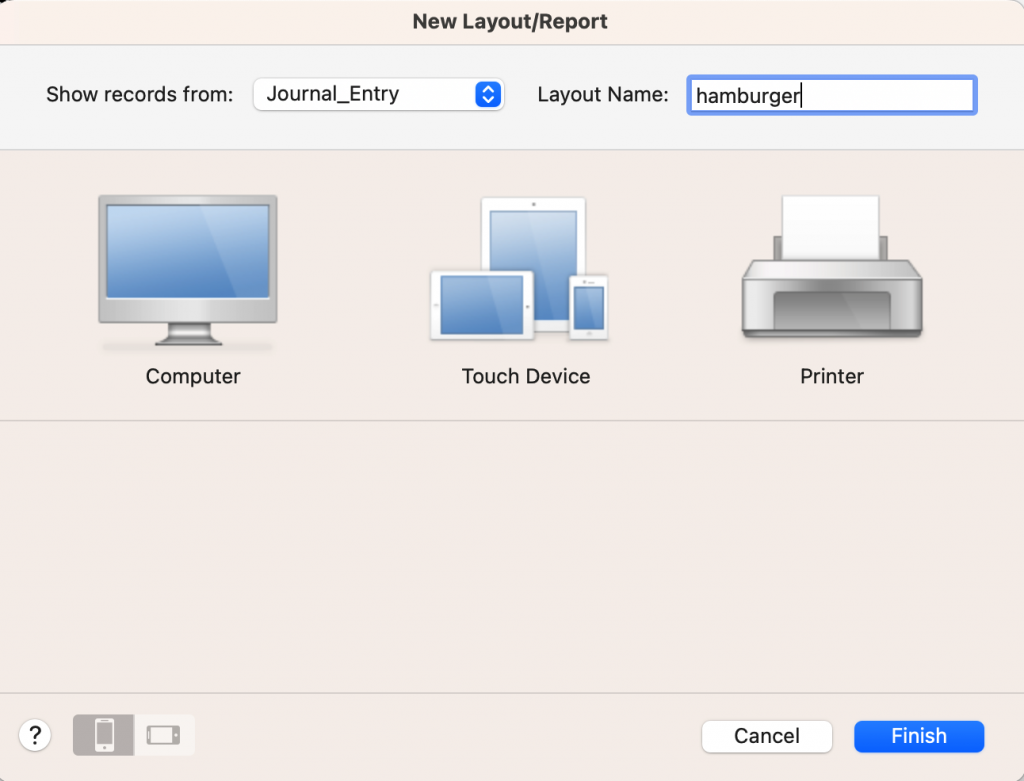
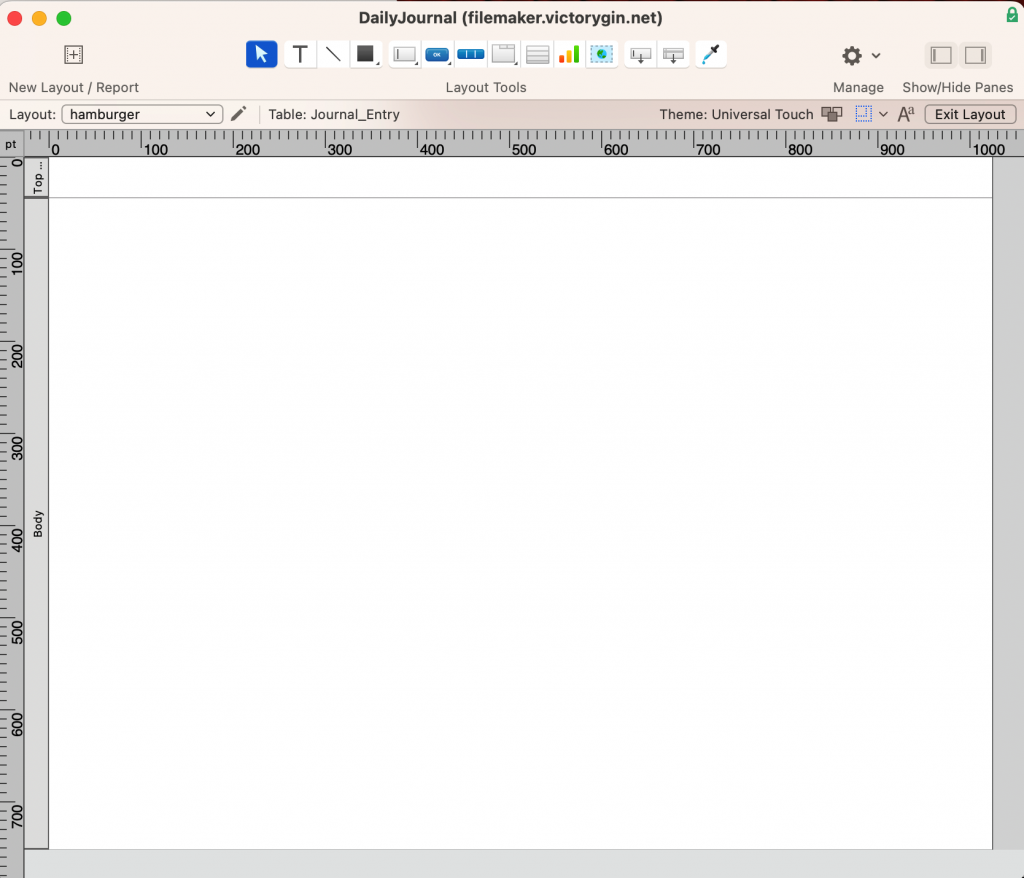
Next we’ll take a moment to create a layout for our menu. Create a new window (Window menu:: New Window) and make a new layout and save it with a meaningful name like “Menu” or hamburger or whatever works for you. Once you save it with a name, you’ll have a new layout in the new window. I’ll go ahead and suggest you want a layout that’s tall and narrow-ish but for the moment it doesn’t really matter. For the sake of convenience, leave it open and move it to one side.
Next we’ll add the first bit of scripting that will open our menu. The script now has an IF and END IF surrounding the new window command that is defined to open our new layout in a card window floating over the existing layout. Notice that the IF is looking for the variable to have the word menu in it. That comes from the setup of the button way back at the top of this lesson.
In order to use it, you’ll need to save your layout where the button lives and give it a click. Did it work? If it did, close that new card window with the x in the corner and let’s go about creating an actual menu on your new layout.

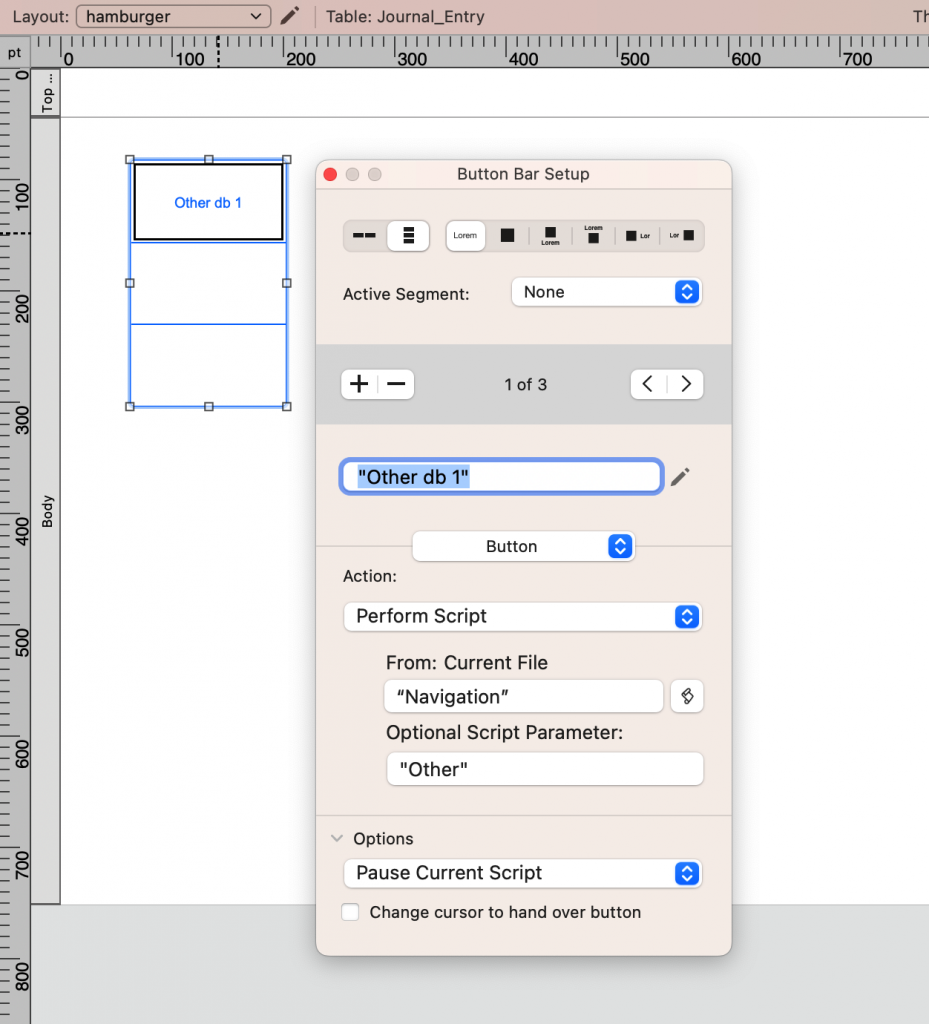
Using the Button bar tool, draw a rectangle on your menu layout. By default it will create a button bar with 3 buttons (segments) in a horizontal orientation.

In order to create a vertical menu, change the upper left-most choice to match the image below. I’ve also moved ahead with a name in the first button with a script and parameter specified. Let’s save this and go back to our script.
In this image you can see we’ve added the lines 8 and 9. We use an Else If script step from now on to add as many options as you might need. This same menu can be used to drive the entire navigation of the system and even more than one menu.
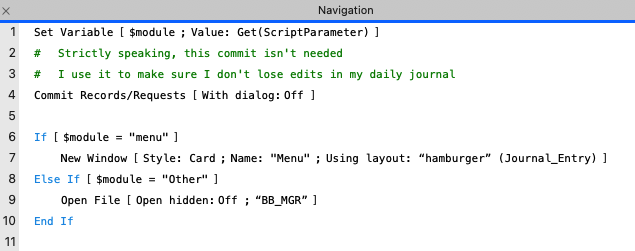
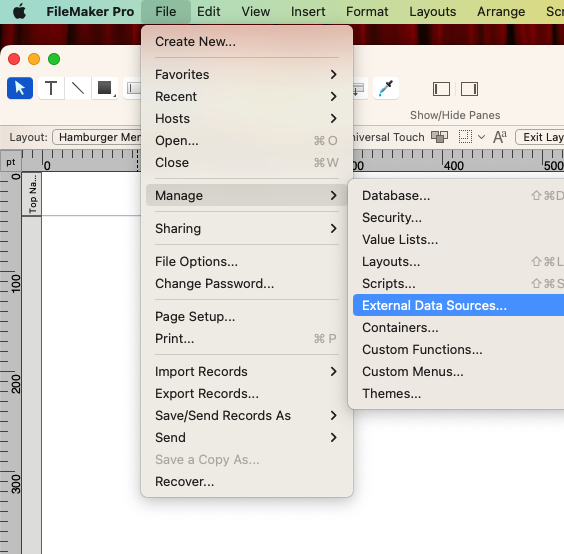
Notice that the Else If is looking for the variable to match the string “Other”. When it does, the Open File command will be run in this case because we’re opening another database. This file will need to be added to the External Data Sources so that we can choose it in the Open File script step dialog. (see below)
A quick word on Else If. We use it because it has an advantage over other methods. Once an Else If is chosen because it’s true, all others will be skipped. If you have a couple dozen of these, it makes sense to put the most often used at the top so that the majority of the script will not have to run. (big performance boost here)
Most of these menu items on my system are just New Window with a specific layout (our menu on line 7 and another on line 15) and some are Open File where we’re opening a different database (lines 9 and 13). There are likely other things you’ll want to do when selecting a button… Frankly you have enough at this point once you’ve adjusted the size of the layout and the number of buttons that your menu is ready to use. I’ll share one more item that you might find useful. Line 11… Perform AppleScript.
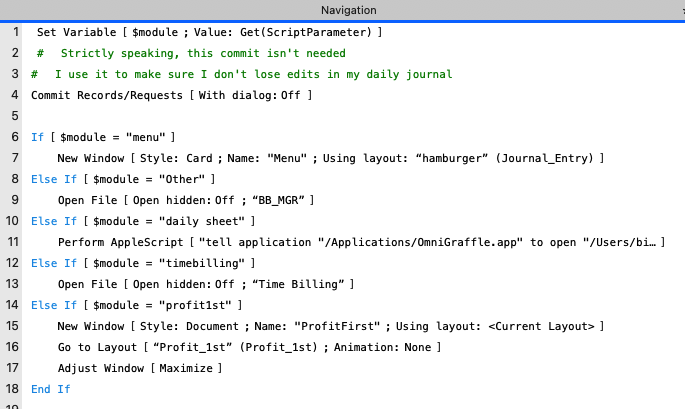
APPLESCRIPT to open an unrelated document.
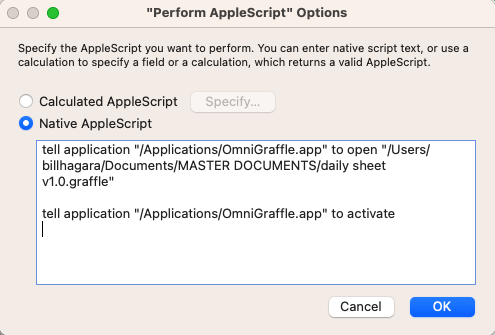
You can just type this out to perform something similar but one thing I wanted to explain is that the paths to the application and to the document need to be correct and complete. There is an extremely easy way to do this on a Mac and while I don’t doubt the same thing works on a Windows computer in general, this is AppleScript and you’ll need different technology to do it on Windows. For those on Macs, you can merely position a Finder window nearby that contains the applications and one that contains your document and just drag the icons into this dialog and your Mac will do the rest. You’ll find a short video demo of that in action below.
A couple of things to keep in mind… these paths are surrounded by quotation marks and you’ll have to add them yourself. If we diagram this just a little it looks like:
tell application “path to app” to open “path to document”
The second part is just how you bring the new application to the front. Without it, you’ll get the program open with your document loaded but Filemaker will remain in front.
Here’s that video:
https://www.berrycast.com/conversations/793b29f7-c761-5d85-8fb9-694b5c647a9e/video-player
Leave a Reply
You must be logged in to post a comment.