Help-R&R-Scheduling
ADRC Ride Scheduling system Scheduling
Scheduling

When opening the system, the first screen presented is the current schedule. The list can show Ride Requests for any given day by changing the chosen date.
The Ride Requests list shows all the relevant information for each Trip in an easy to use format and allows for Driver and Car to be changed without having to move to another screen. Editing any other information is done at the Trip Detail screen.
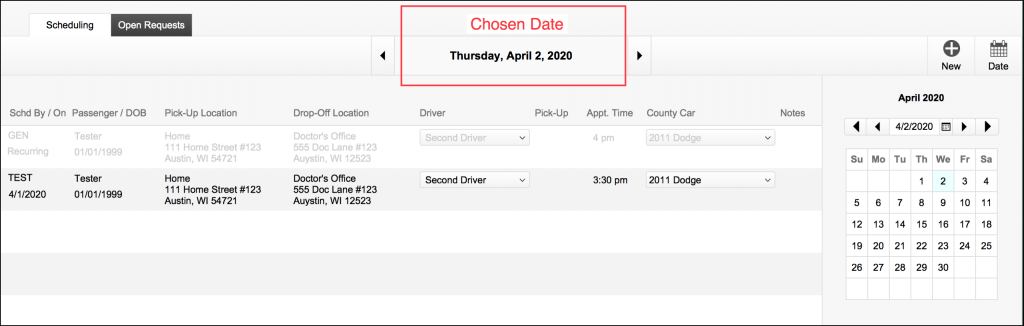
The Scheduling list shows Requests for any chosen day. The day chosen is shown in the upper-middle of the screen and can be navigated in one of two ways:
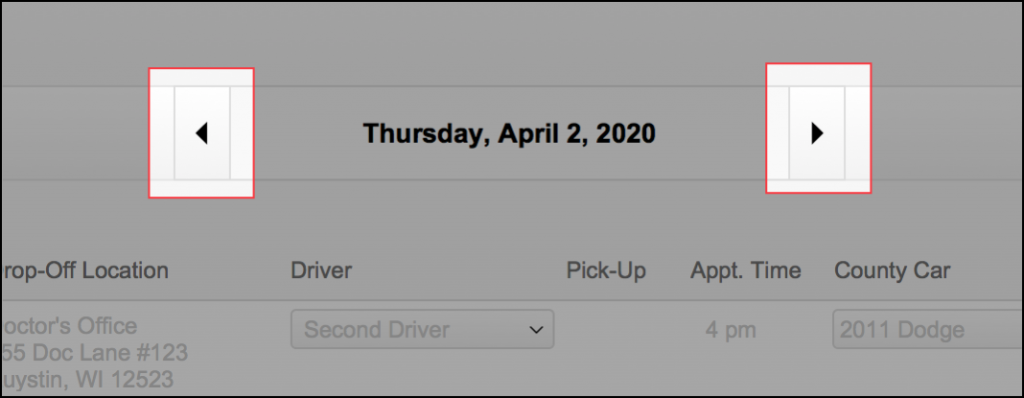
- By using the arrows to the right and left of the chosen date to move to the future and past respectively one day at a time.
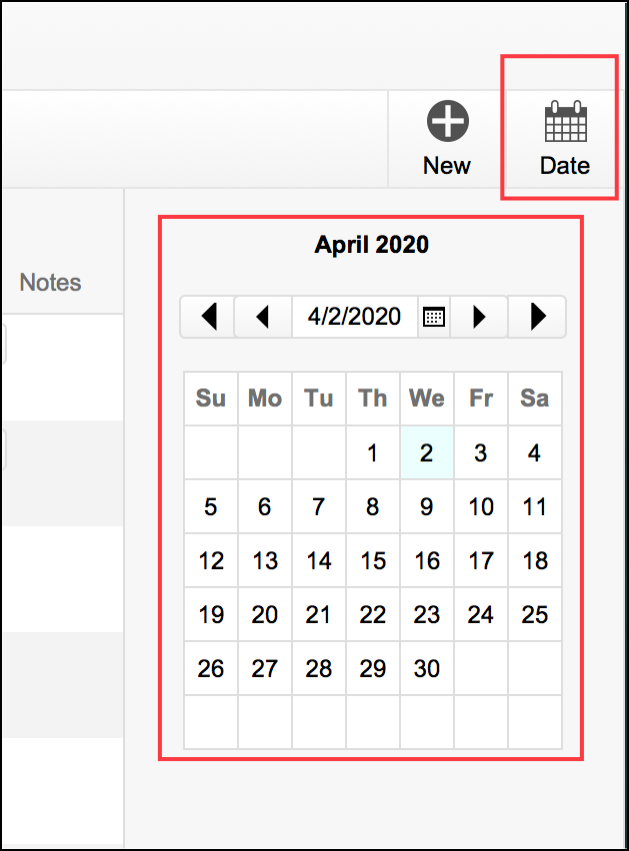
- By selecting a date from the calendar picker on the right-hand side of the screen. If the calendar is not showing, it can be made visible by touching the ‘Date’ button in the upper-right of the screen.
Adding a Trip – Ride Request
To begin a new Ride Request, click the ‘New’ button in the upper-right corner and you’ll see a form we call the Ride Request wizard. This will walk you through the process of adding the details of a new Trip. The wizard will ask for details of the Trip including:
- Which Passenger (or create a new one)
- Which Driver
- Starting Location
- Destination Location
- Scheduled Date and Time

Add New (plus-sign) button
Step 1 starts with no passengers listed in the portal and is waiting for you to add a portion of a name to the hilited search field. As you type, it will look for matches in the existing Passenger Records and list them. If you don’t see what you’re looking for or you know that this is a new Passenger, click the button below to ‘Create a New Passenger’. If you choose to create a new one, the process will be exactly like having created it in the Passenger module… for our demonstration here, we’ll assume you added them before you began this process.
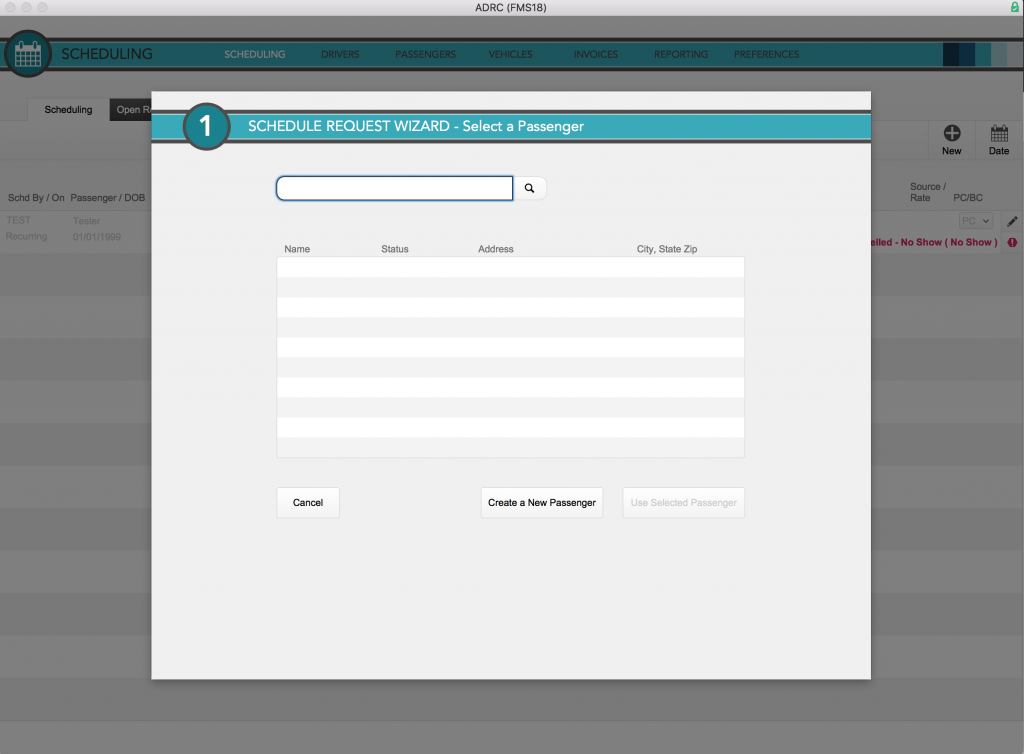
Schedule Step 1
We typed ‘test’ in the search field… because we have Passengers named Test. Here you see the system has found them and listed them.
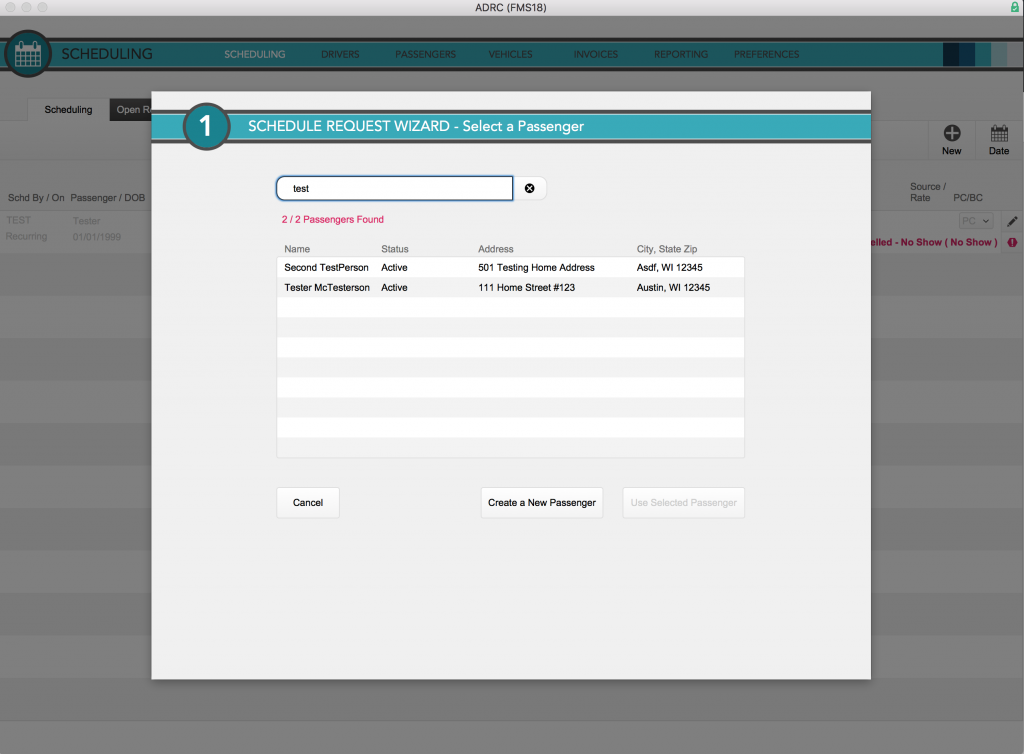
Step 1 – filtered list
We select the Passenger for the Trip and click ‘Use Selected Passenger’ button.
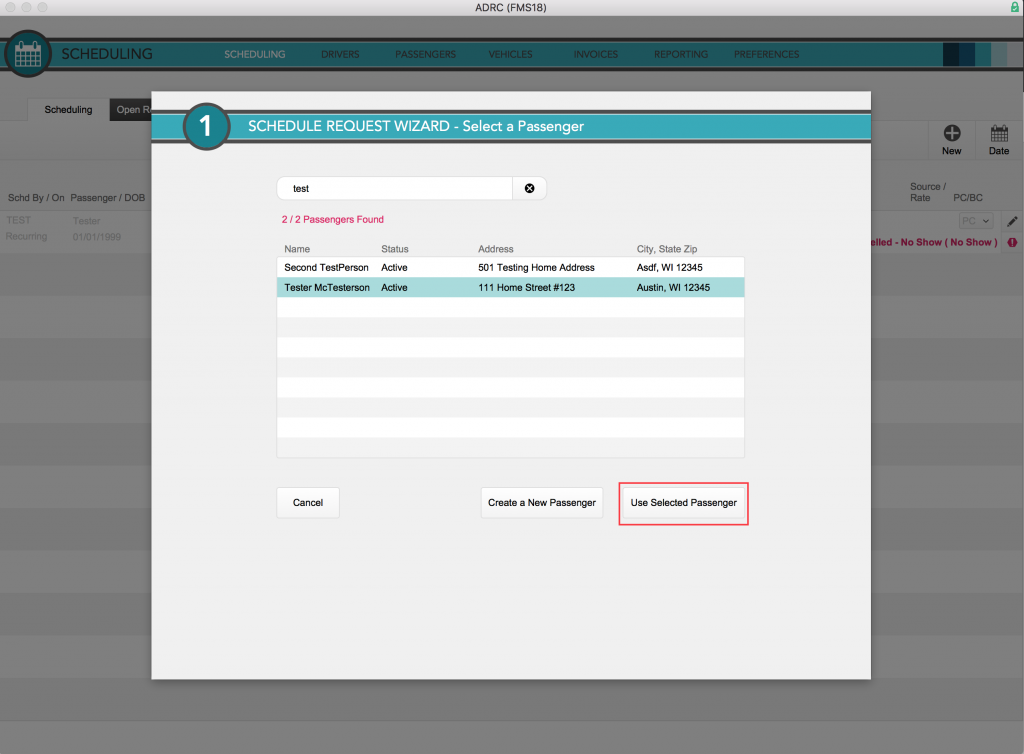
Step 1 – Passenger selected
Step 2 of the wizard process would be to create new Passenger record if we needed one… if we choose an existing Passenger, we’ll see the same screen but all the existing details of our Passenger Record will already be here. Make any changes needed and click Confirm Passenger Info.
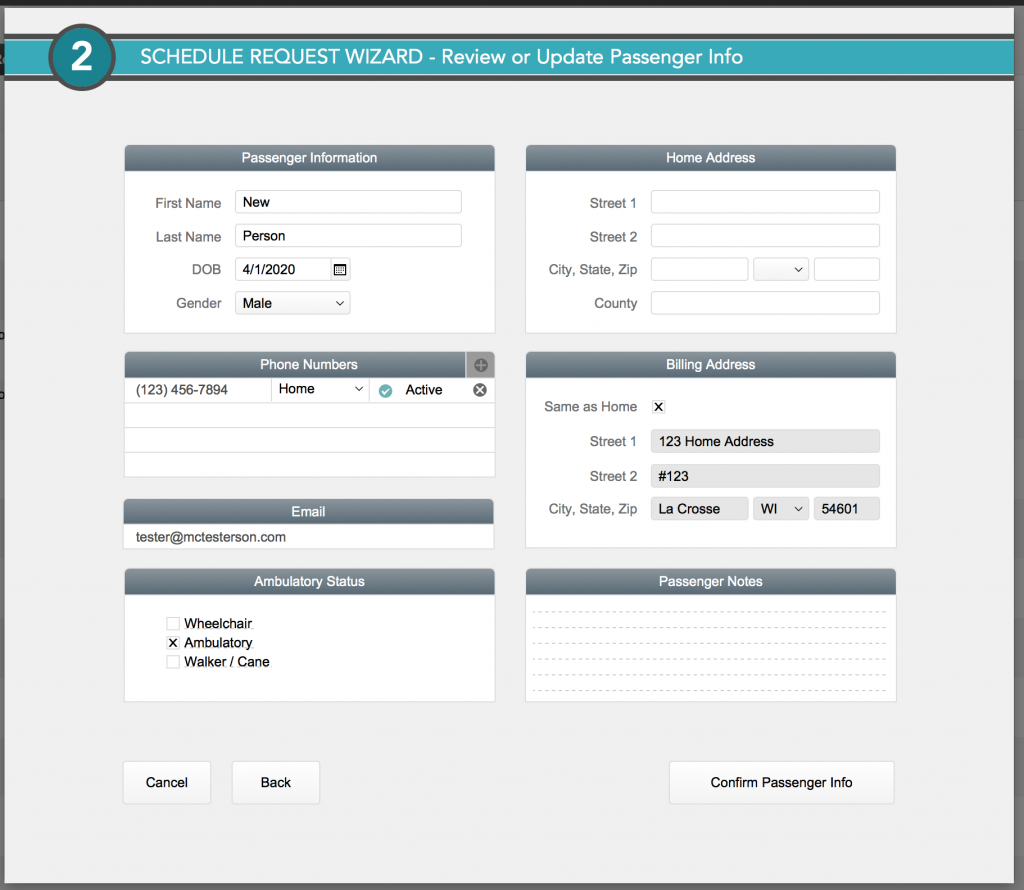
Step 2 – confirm or edit Passenger info
Step 3 is where you’ll define the Trip Details. Specify everything you know about the Trip here including Locations for Pick-Up, Drop-Off, and Payment Source (etc). If this is a Recurring Trip, it can also be specified on this screen.
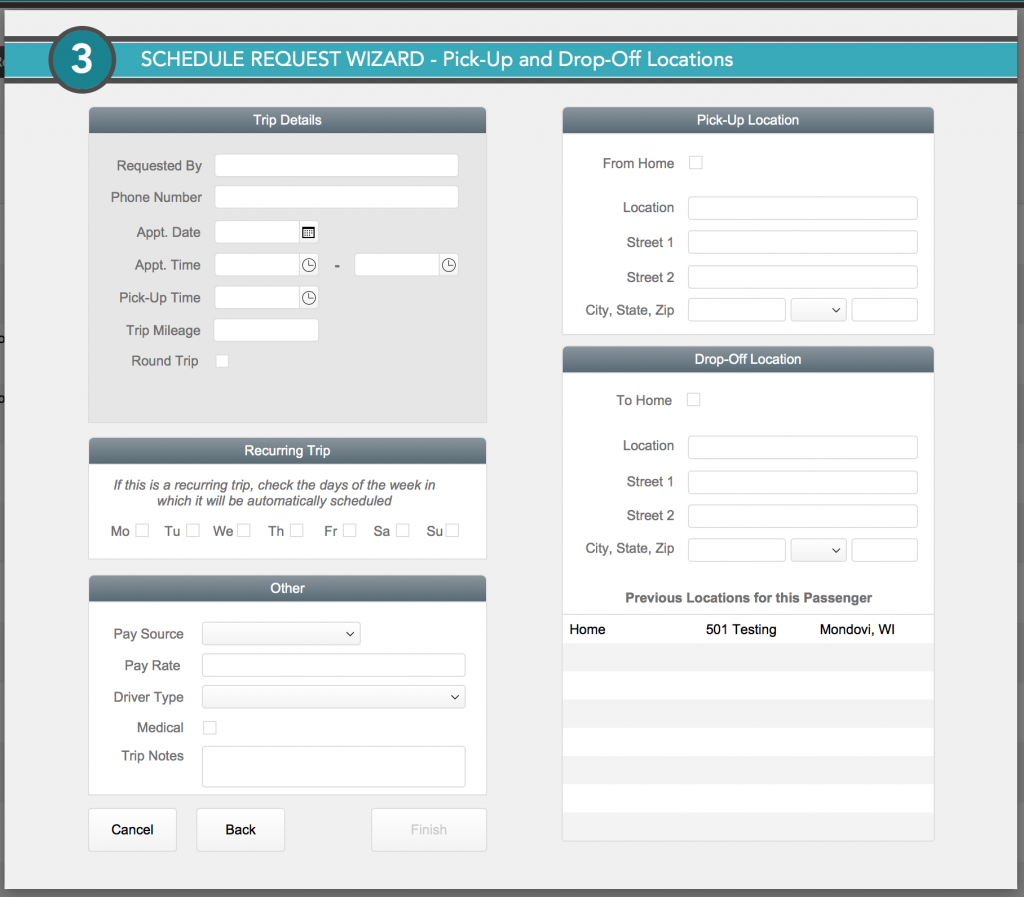
Step 3 – Trip details form
Some Fine Points
The Locations can be easily set to Home with a checkbox. This will automatically take the Passenger’s address for Home and use it in the form for the Trip. Drop-off can also be quickly entered with the use of the “Previous Locations” list. Choosing from this list will populate the Drop-off location quickly.
In the Trip Details there is a checkbox for ‘Round Trip’. This will, in a sense, create both sides of the round trip by adding in a Pick-Up time for the 2nd half.
Click ‘Finish’ when complete and your Trip is added to the system’s Open Requests list.
Open Requests
From the opening screen – Scheduling there’s a tab for Open Requests. These are trips that have been created but have not been finalized. They’re listed to the left. Open Requests still need to have a Driver assigned (1), a Vehicle assigned (3), choices made as to emailing (4) and then the trip is Finalized (5). Once Finalized, the Trip is added to the Schedule.
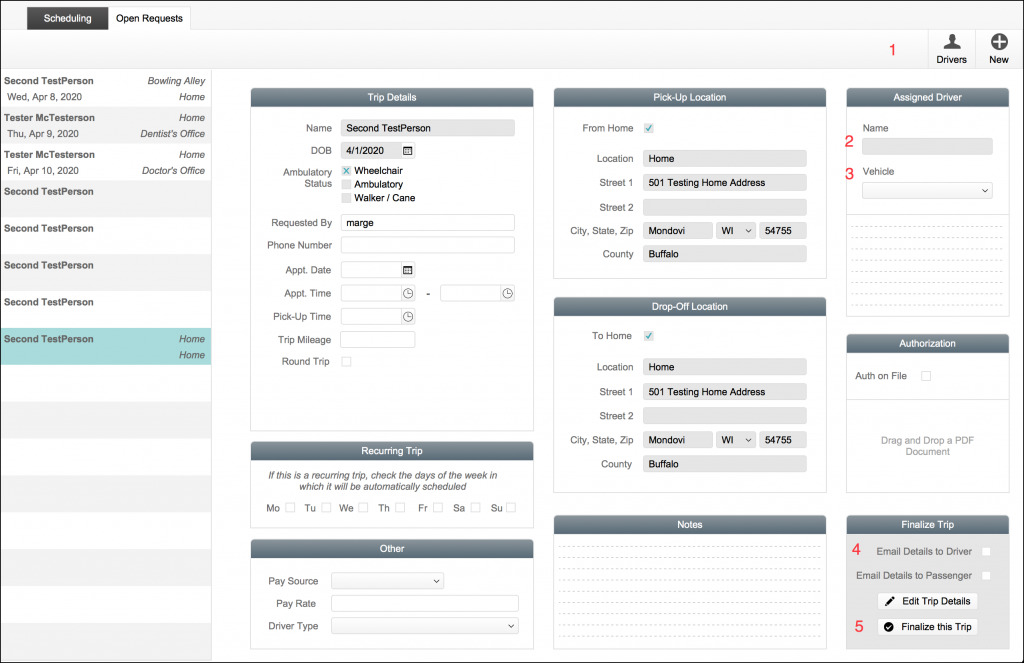
Scheduled trip form
Selecting the Drivers Button (1 in the previous image) you’ll see a picker with available Drivers. Choose a driver and click the button at the bottom ‘Assign this Driver’.
Choose a Vehicle – only those assigned to this Driver will be available.
Check the boxes to Email Details if you want that and click Finalize this Trip.
Finishing up the schedule
Click Yes and you’re done.
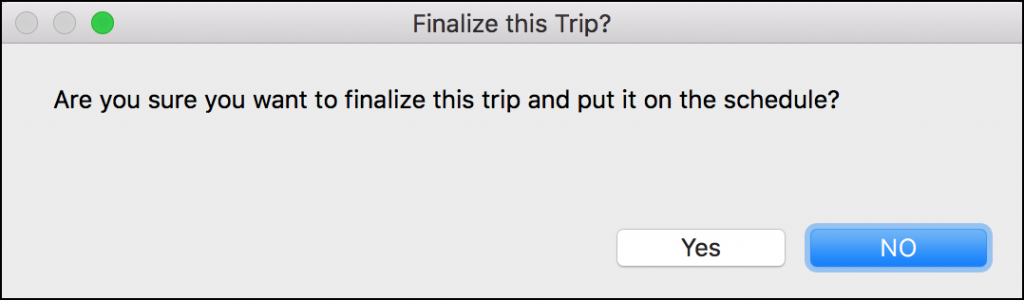
Final step – click Yes